high
Reading Chord and Scale Charts
There are several ways to notate musical examples for the guitar. Standard Notation, Tablature (TAB) and Chord/Scale charts are the most common.
Chord and Scale charts are actually pretty simple once you understand the orientation.
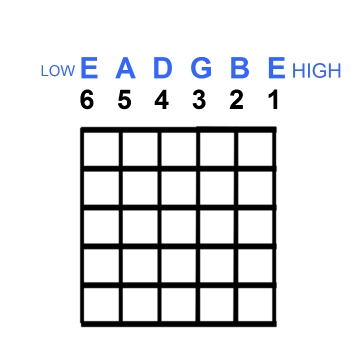
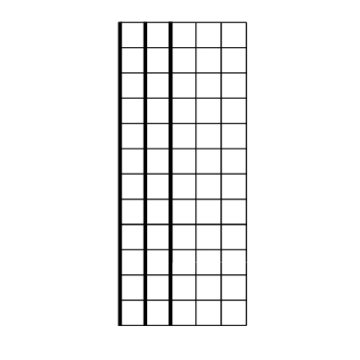
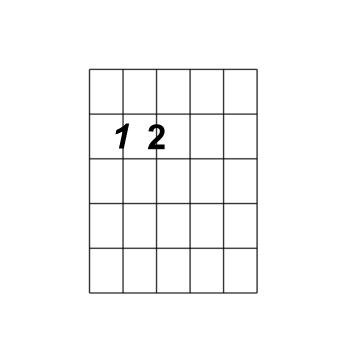
The 6 vertical lines represent each string. The horizontal lines represent each fret.
The example above shows five frets of the guitar neck,
but chord/scale charts can contain as many frets as needed.
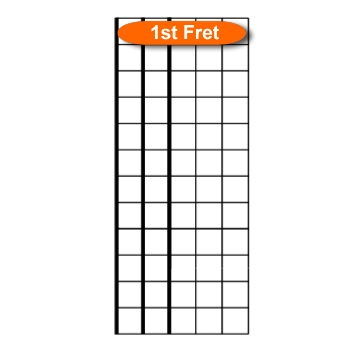
***Always assume the 1st space is the 1st fret…
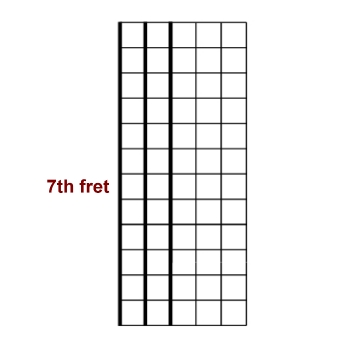
…unless you see a fret number indicating a specific fret.
*If a fret number is specified, use the pattern based on that fret!
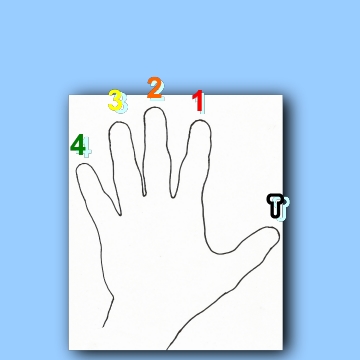
Now that you understand the orientation of the neck graphic, we need to number our fretting fingers…
(*it’s not uncommon to use your fretting thumb (T) to produce chords.)
Make sure you understand that:
-
1st finger=index finger
-
2nd finger=middle finger
-
3rd finger=ring finger
-
4th finger=pinky
-
T=thumb
CHORD CHARTS
*By putting finger numbers on the chord/scale charts, we can create pictorial diagrams of a given chord.
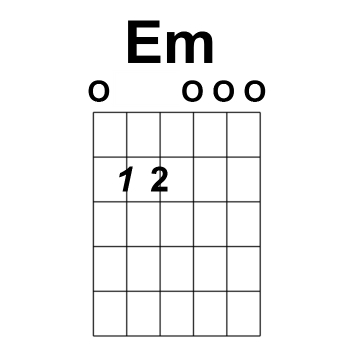
To play this example, you would simply put your index finger (1) on the 5th string/2nd fret and your middle finger (2) on the 4th string/2nd fret. This is a chord called E minor (Em).
But wait!!! We need to know what strings to strum…
Strings are often omitted from a chord. Chord charts use a combination of X’s & O’s to tell us which strings to play or not (you always play the notes that you are fretting).
X=DON’T PLAY!!!
O=include this open string
Play the shape and strum all of the strings. Are we making music yet? If you are confused, reread the earlier sections of this article.
Let’s try a chord that omits 2 strings:
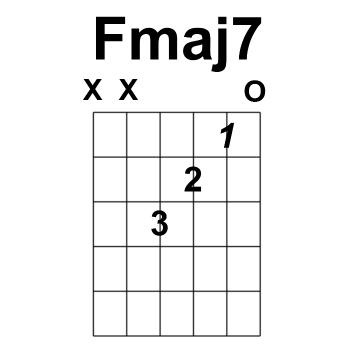
This chord (Fmaj7) can be made by putting your index on the 2nd string/1st fret, your middle on the 3rd string/2nd fret and your ring on the 4th string/3rd fret. Strum the 1st 4 strings.
REMEMBER NOT TO STRUM THE 5th & 6th STRINGS-THEY HAVE BEEN X’D OUT OF THE CHORD!!!
The orientation for chords and scale charts is the same:
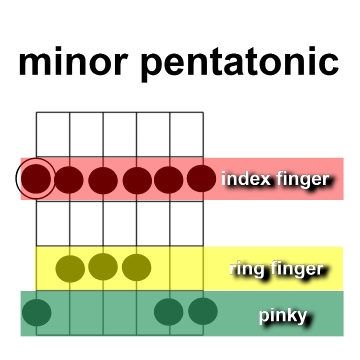
The main difference with scale charts is how they explain fingering. In scales, one finger plays several notes on different strings. You can usually find a logical pattern in a given shape to “assign” a given finger to a specific fret:
This diagram reminds us that the index plays ALL the notes on the 2nd fret,the ring plays ALL the notes on the 4th fret and the pinky is stuck with ALL the notes on the 5th fret. (Notice we don’t use our middle in this example. If we had notes to play on the 3rd fret, it would be logical to use our middle finger to play it.
*Get REALLY used to this four finger grouping-
we’ll refer back to it often!!!
Now all we have to learn is the direction to play the scale.
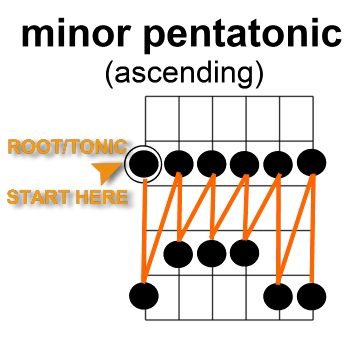
If we want to play the scale ascending (Low to High), we would start on our root/tonic indicated by the circled dot. Now we continue up that string until we are out of notes. Now we move to the lowest note on the next string playing from Low to High. Continue this process until you are out of notes and/or strings…
Here is what it looks like in tab:
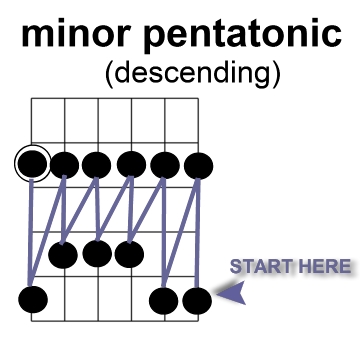
*To play the scale descending (going from High to Low), we would just reverse the order.
Here’s what it looks like in tab:
BASIC STRUMMING PATTERNS
After beginners learn a few chords, their next question is:
Q:”What do I do with them?”
A: Practice switching between them.
Chords are strung together to form the “backdrop” of a song. Single-note melodies are laid on top to produce a finished piece of music. Try playing 2 chords from the BASIC OPEN CHORDS page. Strum one four times and switch to the next. Strum this new chord four times and switch back again. Here’s an example using A Major and D Major.
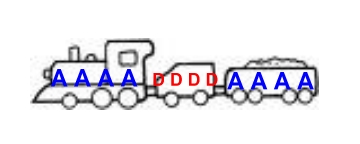
AAAA DDDD AAAA DDDD etc.
For now, let’s use all downstrokes.
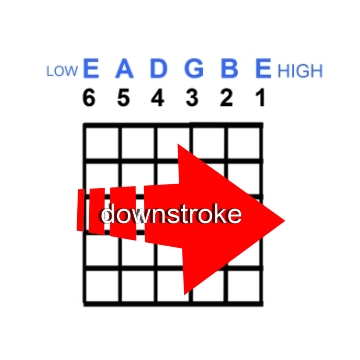
*Downstroke means that you strum DOWN from Low strings to higher strings.
Downstroke four times on A, then four downstrokes on D. Repeat.
After awhile, you’ll notice that using downstrokes exclusively tends to make a chord progression sound “robotic” or “souless”. Think of it this way, if you only use downstrokes, its kind of like using only one leg to get around. Sure, you can hop from point A to B, but wouldn’t it be easier if you just walked to your destination? It’s much easier and smoother going. Allow me to introduce you to your other leg…
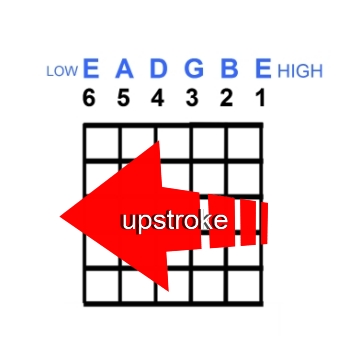
Upstrokes are the opposite of downstrokes- meaning strumming from high strings to lower ones.
The walking analogy will help us understand quite a bit about rhythm. A song starts and walks to the end in a simple fluid motion.
Let’s stop and take a look at Time Signatures.
We know that we can write down any song using TAB and standard notation. But to play it correctly, we need to understand its rhythm.
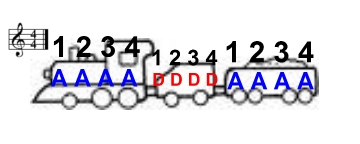
Music is written in increments known as measures.Think of these measures as train cars passing by, with the engine being the beginning and the caboose being the end.
Each of these cars carries a specific amount of beats. It’s common for each measure/car to carry four beats. So common in fact, that counting in groups of four is known as Common Time. Common time is indicated at the beginning of a piece of music by the symbol(s)
or
The earlier example of playing AAAA DDDD AAAA DDDD is a good way to explain it. Each measure/car carries exactly four beats.
In common time (4/4) we string together four beats by counting: 1 2 3 4, 1 2 3 4, 1 2 3 4,etc.
There are other time signatures that you should know about, but you’ll be fine if you start with one more. 3/4 Time
Regardless of what time signature you are in, each measure/car has to have a certain number of notes (or rests) to fill it. We call these complete measures.
explain 4/4 & 3/4. empty milk jug analogy. car, pickup, SUV, motorcycle. down & up strokes like walking. choking chords with the left hand. xxxxxxxxxxxxx
